
 Hi! Welcome to PixelFox, My name is Maggie, I'm a 29 year old Mama of 3! I've been in the world of design since i was about 12 years old, this has ALWAYS been a passion of mine, & now its also my way of making money! I've decided to now share some of my knowledge of photoshop with all of you so that you can start making your OWN designs for shirts/cups/etc. while i know most people use canva for designs, you are very limited to what you can do! with photoshop the possibilities are endless, so stay tuned for ALL kinds of tutorials, from the basics ALL the way up to a PRO.xoxo


 ✿ Owner: Maggie
Photo Overlay <3
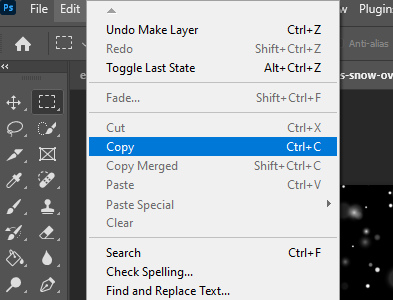
You will need an overlay, you can purchase any overlay you want! Rain/snow/etc. i get mine from etsy, or even for free from google sometimes! - you can also make your own! but that takes a lot of time, so we are gonna do it the simple way! especially since this is beginner friendly <3 Click HERE for the overlay I will be using for this tutorial! anyway, once you've found an overlay, open up the overlay & your photo in photoshop! on your overlay tab, go to layers & double click the layer that says "background", & then click OK in the box that pops up. Now go to EDIT at the top of photoshop, & then COPY (like below)
Now you're gonna go back over to your picture you want to put the overlay on, go to "Edit" again, & Paste. Once your overlay is on your photo, look for this tool in your tool bar, this is the tool you need to move the overlay around on your picture, make sure the whole picture is covered.

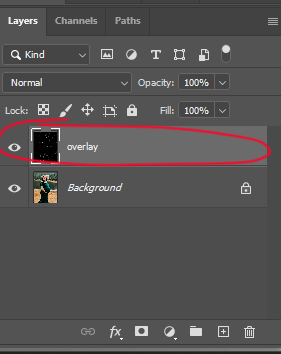
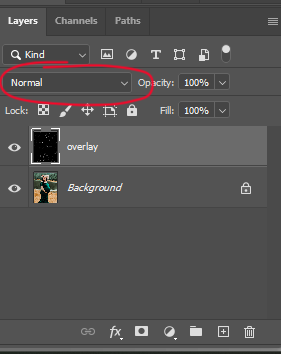
Now go over to your layers, make sure you're on the layer with the overlay on it, which should be the very top layer.(I changed the layer name to overlay) like below
Now go to where it says "Normal" & change that to "screen"(see below), it depends on your photo, if screen doesnt look right, try lighten, softlight or overlay. it depends on the overlay and your picture! You also can adjust the opacity of the overlay if its too much, also if you're using snow or something like it, and the snow is covering is covering up too much of someones face or something you just dont want covered, just go to the eraser in your tool bar & erase that part! make sure your brush size is a good size though.. anyway, this is what you're looking for right now.. changing normal to screen
Now right click on that "overlay" layer, & then click merge visible. this will make both layers into one. & you're done! See my before & after below!
