
 Hi! Welcome to PixelFox, My name is Maggie, I'm a 29 year old Mama of 3! I've been in the world of design since i was about 12 years old, this has ALWAYS been a passion of mine, & now its also my way of making money! I've decided to now share some of my knowledge of photoshop with all of you so that you can start making your OWN designs for shirts/cups/etc. while i know most people use canva for designs, you are very limited to what you can do! with photoshop the possibilities are endless, so stay tuned for ALL kinds of tutorials, from the basics ALL the way up to a PRO.xoxo


 ✿ Owner: Maggie
Preppy text tutorial 3
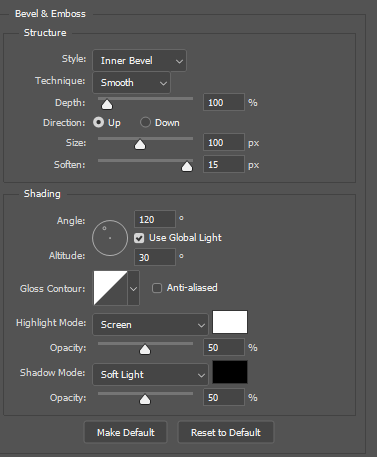
Before you start this tutorial, you need to save this pattern! & this pattern! open them in photoshop, go to edit at the very top of photoshop,scroll down & click define pattern, click ok when the box pops up! now its in your patterns! also please check out THIS tutorial before you proceed with this one! you will need to know the basics first! Now that you've got your text typed out, you want to have a color scheme in your swatches ready for use (go look at my "choosing color schemes" tutorial for how that process works,click here for the color scheme we will be using for this tutorial! SAVE IT, and open it in photoshop & follow the choosing color schemes tutorial, as well as the "coloring text" tutorial! Now that you have the basics, and you've colored your text, go to your "layers" panel to the far right (if you dont see it anywhere, go to window at the top of photoshop & click layers, now that you've located that, double click your text layer, when the layer style box pops up,go to "bevel & emboss" and match your settings to mine...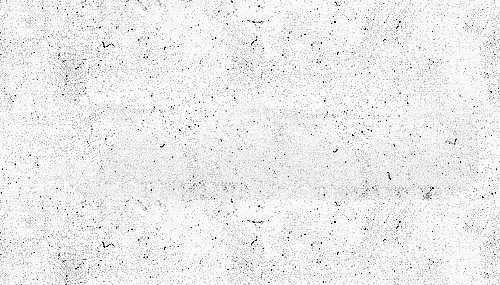
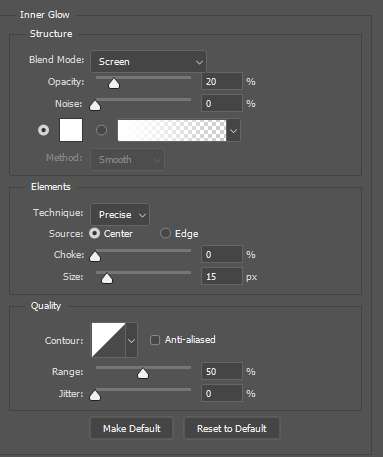
Now go to "Inner glow" & match your settings to mine..
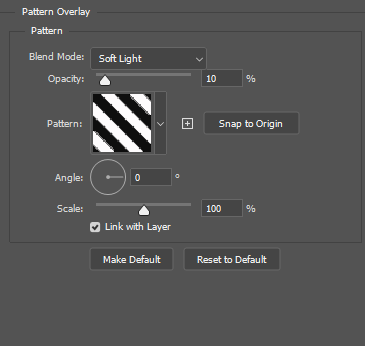
Now click on "pattern overlay" & match your settings to mine, find the STRIPE pattern in the pattern box that we saved earlier!
Now click ok, on your text layer, right click & click "duplicated layer" you should now have 2 layers, go to the bottom layer & double click it, double click it, when the layer style box pops up, click "color overlay", change your blend mode to "overlay" and the color to black.. click ok. Now go over to your tools & select your move tool..pictured below..

Using the arrows on your keyboard, move to the right a couple times & down a couple of times.. or however many you would like! heres my text so far..

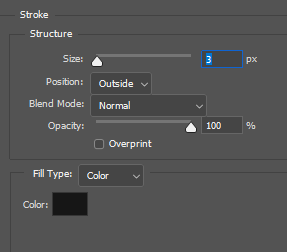
Now go to your top layer, right click it, & then click "rasterize type", then right click on the text layer again & click "merge visible", you should now only have ONE text layer. Double click on it, when the "layer style" box pops up, click stroke, the size of your stroke depends on the size of your text, but usually its around 2-3px, and you want the color of the stroke to be a dark gray in for this kind of text.. here are my specific settings for this text..
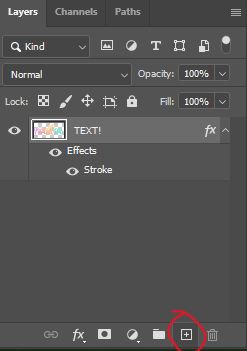
OK, so heres something you should know for all your future texts tutorials, every time you want to add more than one stroke, or more than one of anything to one text layer, you have to create a new blank layer and merge it with the existing layer.. SO, since we will be adding ANOTHER stroke and another pattern to this text, you need to go to the little addition sign at the bottom of your layers panel, ive screen shot it & circled it below..
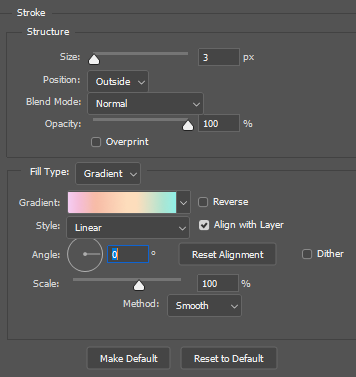
Now that you've made a new layer, drag it below your text layer, go to your text layer, right click & click merge visible, you should now have just ONE layer again. Double click it, when the layer style box pops up, click stroke again.. this time you're adding a GRADIENT stroke, so where it says "fill type" change it from "color" to gradient,make sure your angle is set to 0, click on the actual gradient, click on the little paint bucket under the gradient, then click on the first color of your text, & then go back to your gradient, click beside that other paint bucket to make new paint bucket, go click on the second color of your text, and keep doing this until your whole text stroke matches your text.. heres what my settings are looking like..
Now go to "pattern overlay" , in the pattern box, find the static pattern I gavw you at the beginning, and match your settings to mine..

& YOU ARE DONE! HERES THE FINAL PRODUCT!